Meringues have a bad rep for being too high maintenance. They certainly are sensitive, but there’s no denying that this gorgeousness is worth any extra effort:

Peppermint Meringues
There are a few very important (and not so complicated!) steps to take to ensure that your meringues come out perfectly fluffy and delicious:
- Make sure that your mixing bowl, whisk, and all utensils are exceptionally clean-absolutely no residue whatsoever! Meringues are very particular and will not fluff up properly if they come in contact with any moisture, grease, or fat of any kind – even oils from your skin, so keep your hands to yourself!
- Save meringues for a sunny day! If it’s a rainy and or humid day, the moisture in the air may prevent the egg whites from whipping up.
- The temperature of your egg whites makes a huge difference. Room temperature eggs will whip up faster and with more volume than cold eggs. Leave your eggs out for at least 30 minutes before your start your meringues.
- There can be positively no yolks in your whites-the fat from the yolks will interfere with the foaming process.
See, that’s not so intimidating is it? Now that you’ve learned the essentials, you’re ready to whip up some festive, fluffy, awesomeness!
What you’ll need:
- 6 egg whites at room temperature
- 1/4 teaspoon cream of tartar
- pinch of salt
- 1 teaspoon vanilla extract
- 1 teaspoon peppermint extract
- 1 1/3 cups sugar
- red gel food coloring
- a small paint brush
- a pastry bag with large star tip
- a mixing bowl with whisk attachment or an electric mixer
Preheat your oven to 200 degrees. Place the egg whites, cream of tartar, pinch of salt, and vanilla and peppermint extracts in your mixing bowl. Beat until the egg whites form soft peaks, meaning that when you pull the whip or beater out of the whites, the peaks that form will have tips that bend over the beater.

Ready for a beating
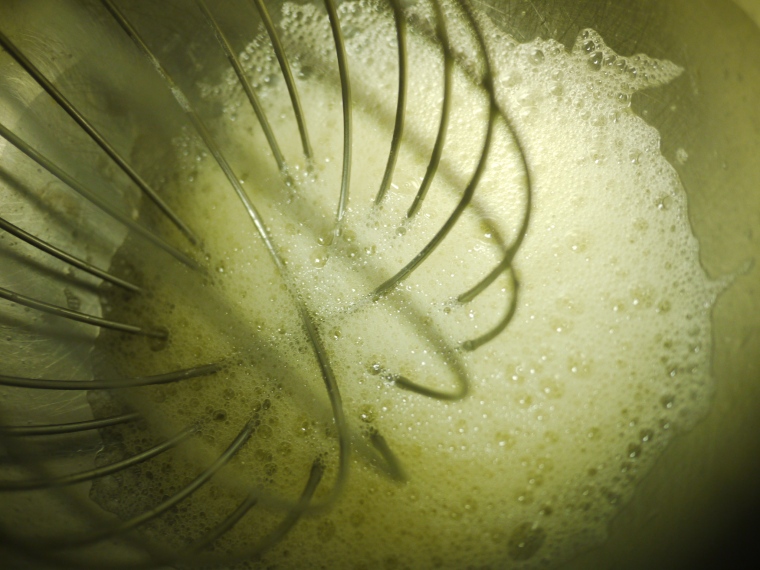
After a few minutes the egg whites begin to foam
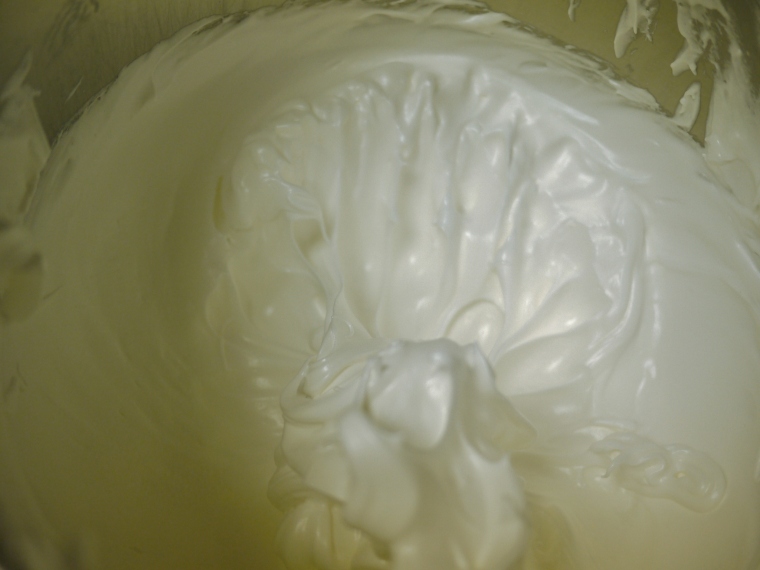
This is what your mixture will look like once soft peaks have formed
Once soft peaks have formed, continue to whip the egg whites while slowly adding in the sugar. Be very careful when adding the sugar-if it’s not streamed in slowly and gently, it might cause the egg whites to deflate and or collapse. Once you’ve added all the sugar, continue beating the meringue until it becomes thick and glossy and forms stiff peaks (meaning that the peaks stand straight up over the end of the beater)
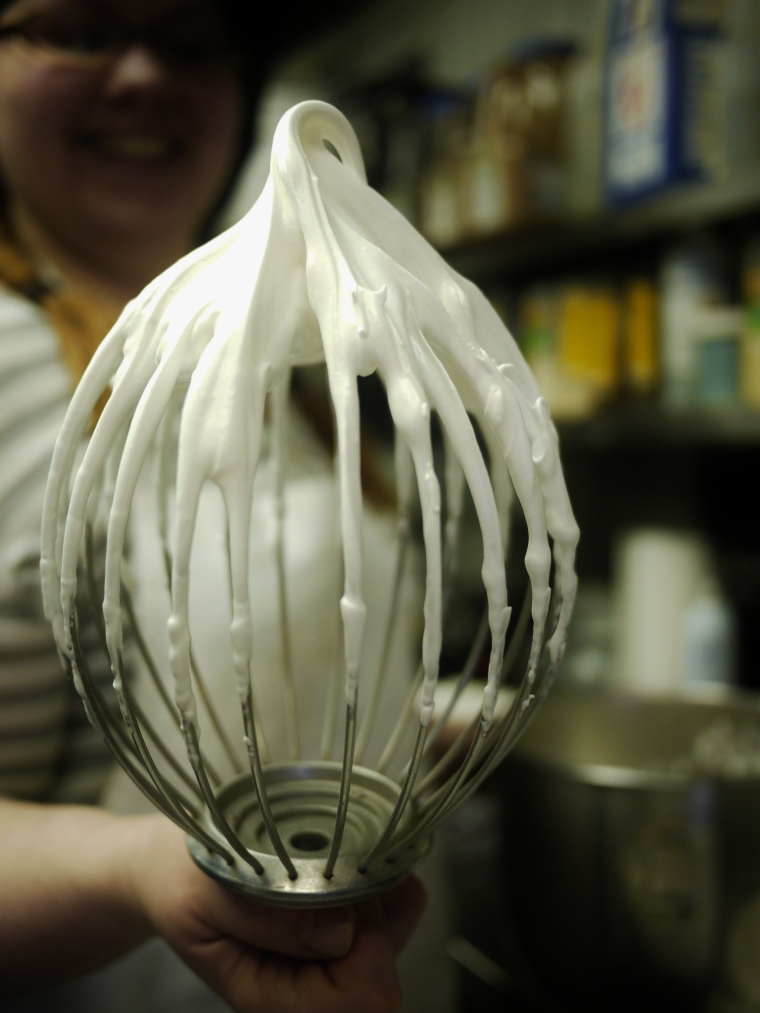
Stiff peaks- the peak stands straight up (except for the cute, curled little end)
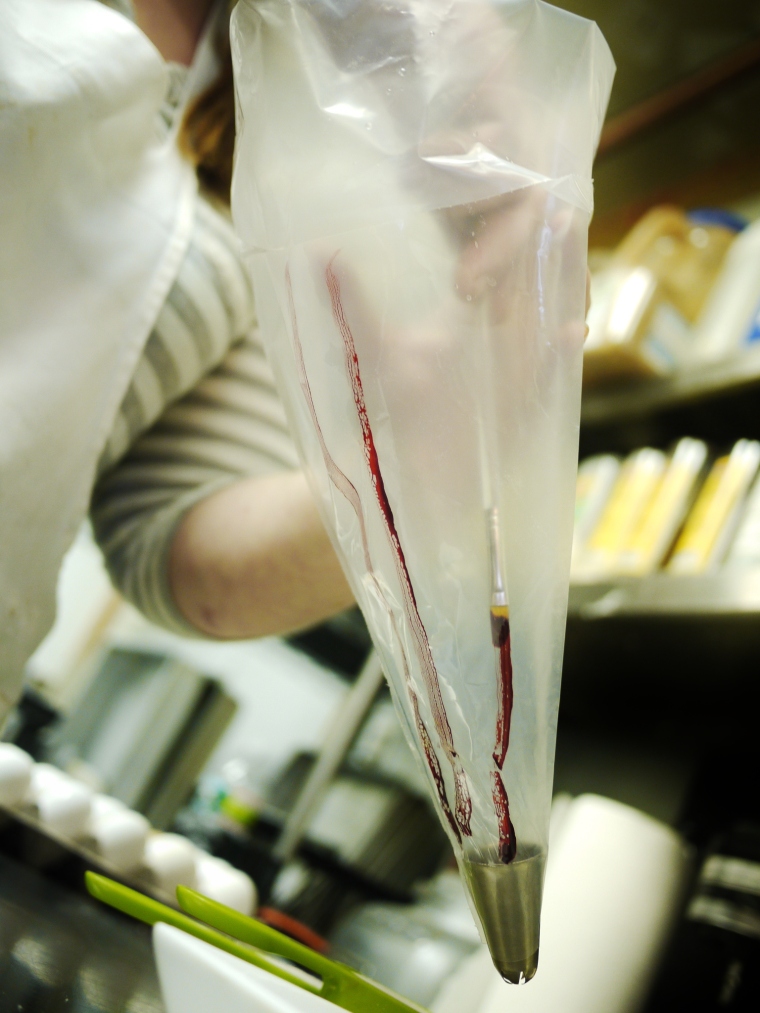
Now you are ready to pipe the meringues! Using the gel food coloring and small paint brush, paint stripes down the inside of the pasty bag. Gently transfer your meringue to the pastry bag and pipe meringues onto a baking sheet that has been lined with parchment paper and sprayed lightly with cooking spray.

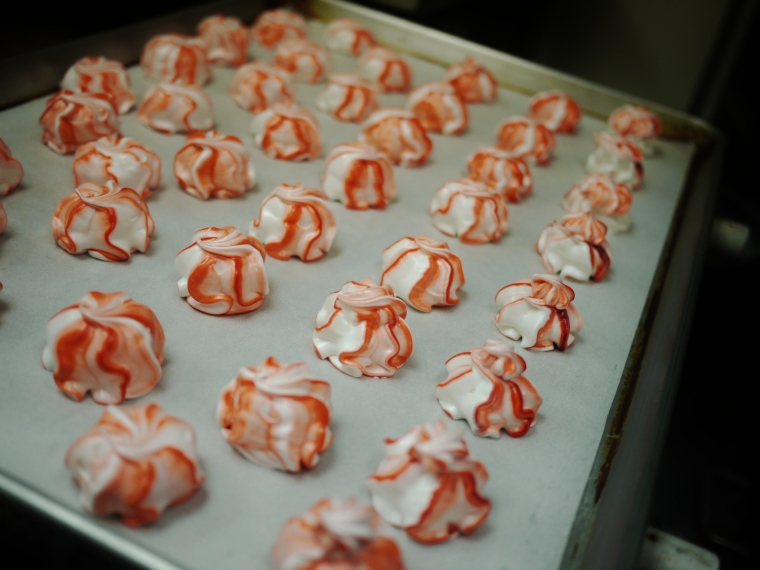
Bake your meringues for 1 t0 1 1/2 hours until they are slightly firm to the touch but not browned. Let cool for 30 minutes before enjoying.
Holiday tip: meringues are very durable and have quite a long shelf life-perfect for shipping to your far away loved ones as holiday gifts!

All photographs taken by Julie Chagnon

Look so lovely!
Thank you! We love the bright colors!
Yum! Thanks for adding the tip about how moisture affects the meringue from whipping up too
Humidity is the culprit for so many baking nightmares! And in out little bakery, temperature and humidity play a major roll in our baking routine from season to season…when the August heat is roasting us in the kitchen, you should see how fast we move to contain the overflowing bowls of bread dough! oh how easy it must be to have a huge temperature controlled factory in which to make your bread dough and meringues…*sigh* ;)But where’s the adventure in that, right??
Good point, if bread/meringues were just made in huge factories, it’d just take the fun out of making it in the first place 🙂
These are the most beautiful meringues I’ve ever seen! I LOVE meringue in general, and it took me many many tries to get to a point where they were pretty+tasty…but it’s SO worth it! Can’t wait to try this technique this holiday season!
They can be tricky little things! So few ingredients, yet so many things can make them fail. I’ve found that once you know what those things are though, it is MUCH more likely they will come out perfectly!